Here’s the thing about making brownies: the mixes are actually pretty good. I promise this recipe is better.
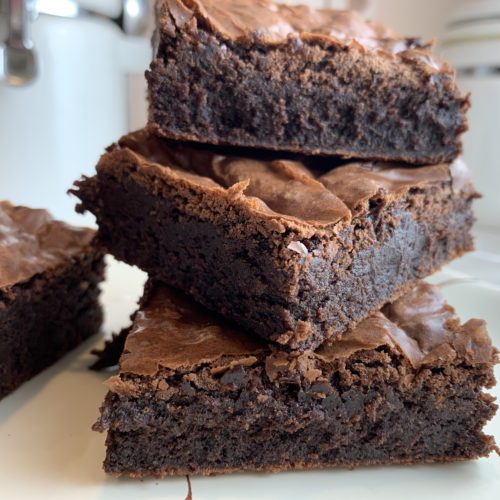
I’m pretty picky about brownies. The first thing it has to have is a paper thin crackly sugary crust. Check.

The next thing I want is dense, moist and chewy. If I wanted chocolate cake, I would eat chocolate cake, am I right?
Check.

What makes these brownies special
- Brown butter gives a depth of flavor you won’t get from vegetable oil in a mix
- A touch of brown sugar adds even more flavor
- I use milk chocolate baking squares! That’s what’s giving these beauties that light mocha colored crust on top. You can go darker if that’s your taste preference. But I find that milk chocolate lets ALL your flavors shine through instead of overwhelming the bite with intense chocolate. If you’re an intense person who likes intense chocolate, consider using 60% or 70% cacao baking chocolate squares.
- Whip the eggs to give it a lift from air bubbles. There’s no leavening in this recipe (remember, we’re making brownies; not cake). Whip those eggs nice and frothy for about 5 minutes in your stand mixer, and be sure you start with cold eggs.
- Kosher salt never dissolves entirely, so some bites have a surprise burst of salty-sweet that is to die for.
- I’m going to go against the crowd and NOT recommend adding espresso powder to “intensify” the chocolate taste. Don’t get me wrong, I love coffee. I wish I could drink it in my sleep. And I think espresso brownies are yummy. But it’s a myth that people won’t be able to taste the coffee. People who don’t like coffee can taste the coffee, and you just ruined their brownie. It’s like biting into an oatmeal raisin cookie when you’re expecting chocolate chip. Just not good. Add 1 tsp of espresso powder if that’s how you roll, but I think these mellow milk chocolate brownies don’t need it.
CakeBoss Milk Chocolate Brownies
The best scratch brownie recipe you will ever use.
Print
Pin
Servings: 16 2" squares
Cost: $6.70
Ingredients
- 3/4 cup butter lightly salted
- 3 oz milk chocolate baking squares semi-sweet or bittersweet can be used
- 1 1/4 cup granulated white sugar
- 1/4 cup light brown sugar
- 1/2 tsp kosher salt
- 3 eggs
- 2 tsp pure vanilla extract
- 3/4 cup all-purpose flour
- 1/2 cup dutch processed cocoa powder
Instructions
- Preheat oven to 350.
- Line an 8x8 aluminum cake pan with foil. Spray with nonstick spray.
- In a heavy bottomed saucepan, melt butter over low heat, swirling occasionally. Cook butter until the popping stops and the color is deep golden yellow.
- Add baking chocolate squares to butter and let the chocolate melt.
- Whisk together flour and cocoa powder in separate bowl.
- In a stand mixer, combine sugars, cold eggs, salt, and vanilla. Whip on medium speed for 5 minutes. I use the '4' speed on my KitchenAid mixer.
- Stir together butter-chocolate mixture until well combined, and pour into egg mixture while mixing slowly.
- Add flour-cocoa mixture to your chocolate-egg mixture, stirring slowly until just combined. Don't over-mix! Take the bowl out of the stand mixer and mix by hand just a few times to make sure all the mixture at the bottom has been incorporated.
- Pour batter into prepared pan and shake gently to smooth out.
- Bake for 35-40 minutes. If your oven runs hot or fast, pull it after 35 minutes. If your oven is slow, leave it for the full 40. Do not bake longer than 40 minutes.
- Let them cool in the pan to room temperature before slicing.
- Store in an airtight container at room temperature for up to 5 days.
Notes
An aluminum cake pan conducts heat better than a glass or pyrex dish. If you use glass or pyrex, your cooking time will be longer.
Cost
I used my CakeBoss Software to price the recipe and it comes out a tad high at $6.70. The majority of the cost is coming from the butter and chocolate, and vanilla. But it’s SO worth it.

